Managing Loans in Funderr
This guide provides a step-by-step walkthrough of managing loans within Funderr.
1. Creating a New Loan Account for a Client
This section explains how to create a new loan account for an existing client.
1.1 Navigate to the Client's Profile:
Start by navigating to the client's profile. From the main "Clients" page, search for the client by name, external ID, or mobile number.

1.2 Access the Loan Creation Menu:
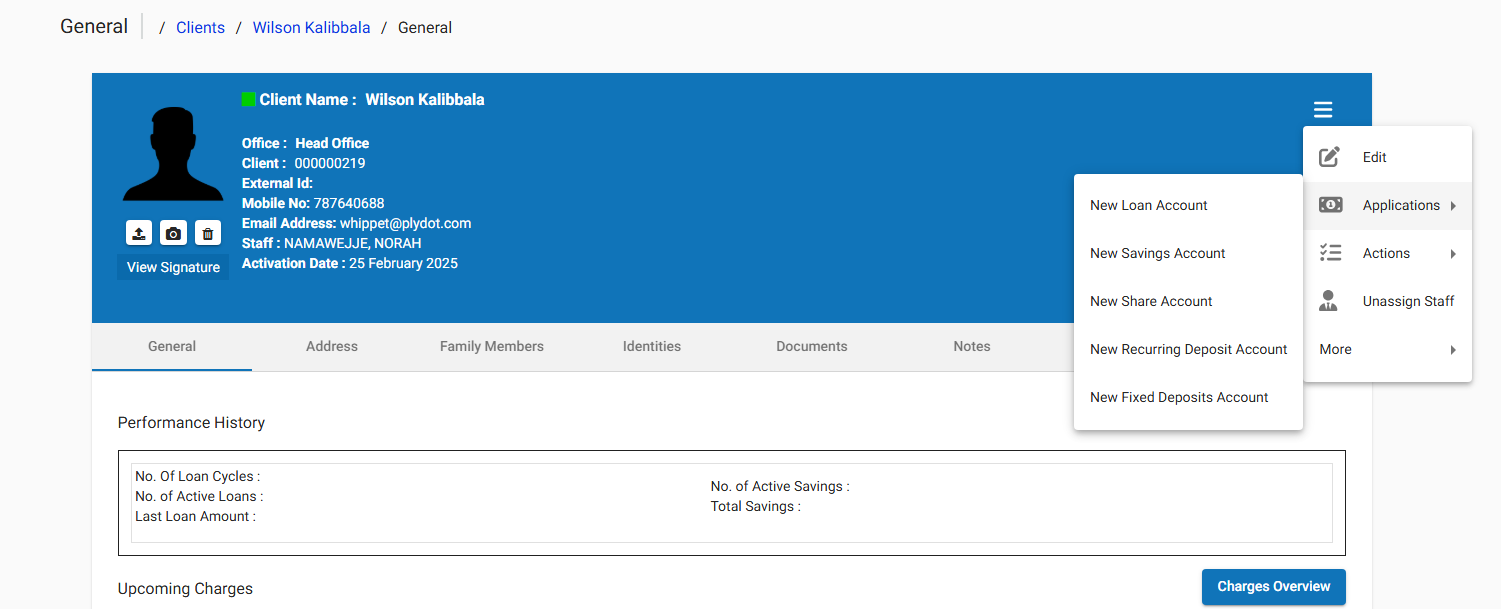
Once you're on the client's "General" tab, click on the menu icon (three horizontal lines) in the top right corner. Select New Loan Account from the dropdown menu.
1.3 Select Loan Product:
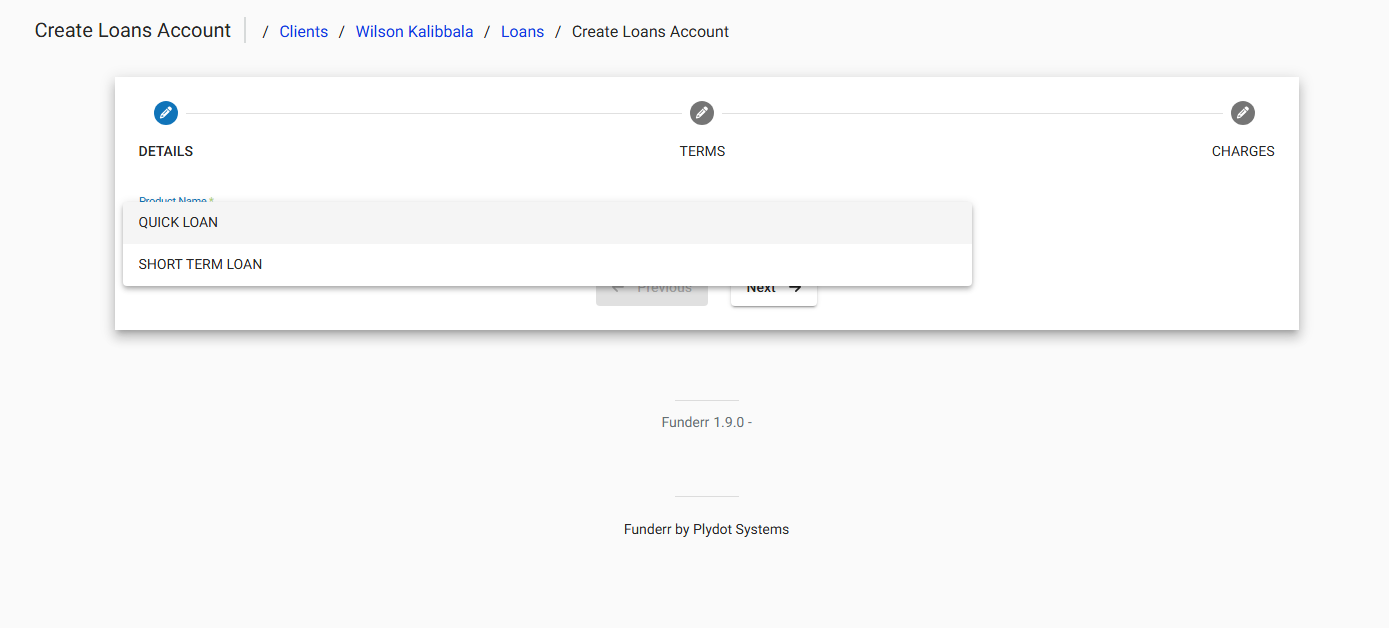
On the "Create Loans Account" screen, choose the desired loan product from the "Product Name" dropdown menu. Available options may include "QUICK LOAN" or "SHORT TERM LOAN".
1.4 Enter Loan Details:
Fill in the required loan details on the "Details" tab:
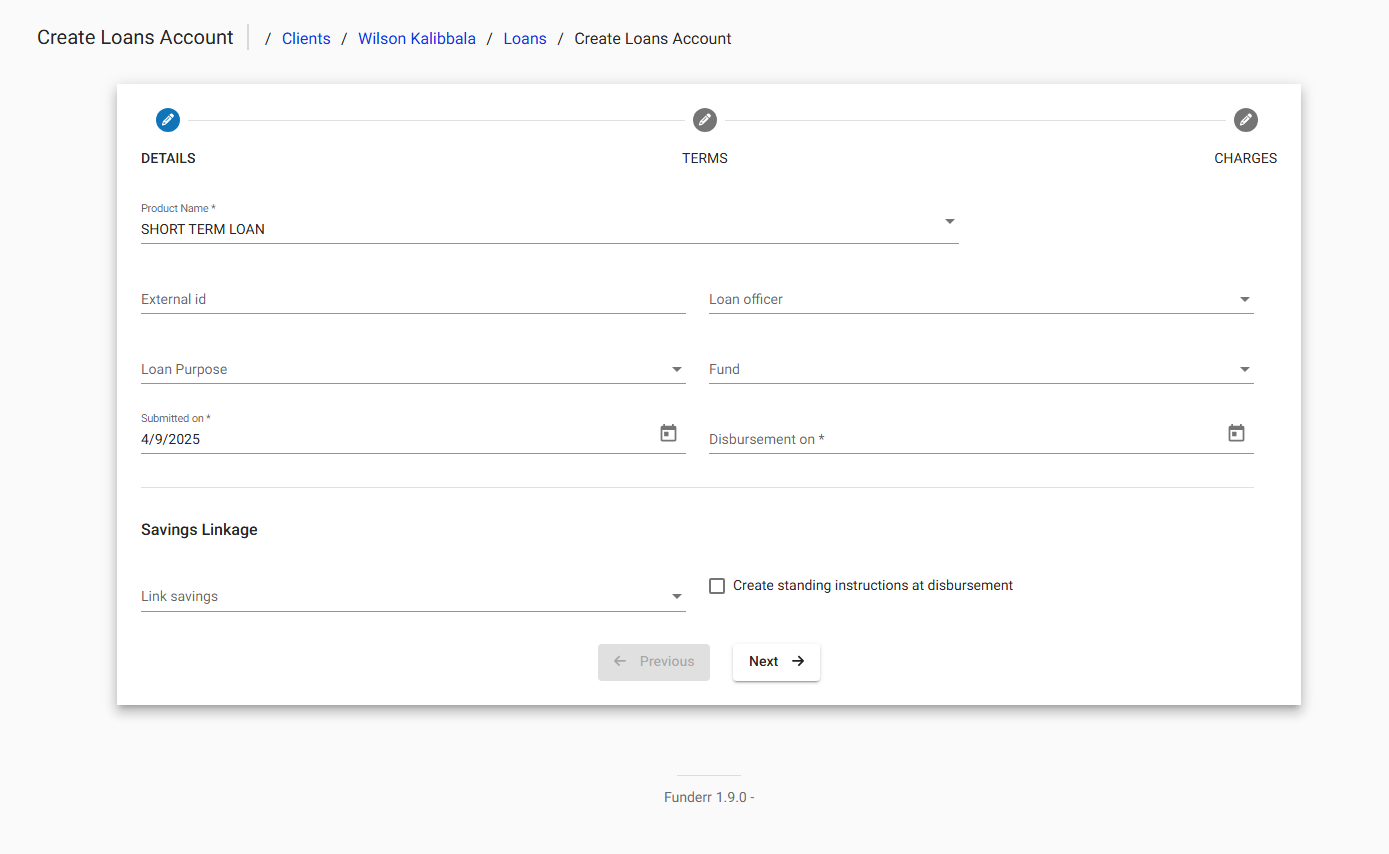
External Id: (Optional) Enter an external identifier for the loan.
Loan Officer: Select the loan officer responsible for this loan.
Loan Purpose: Choose the purpose of the loan from the dropdown.
Fund: Select the funding source for the loan.
Submitted on: This date defaults to the current date but can be changed.
Disbursement on: Set the date the loan will be disbursed.
Savings Linkage: If applicable, link the loan to a savings account.
Create standing instructions at disbursement: Select this box if you want standing instruction at disbursement.
Click Next to proceed to the "Terms" tab.
1.5 Define Loan Terms:
On the "Terms" tab, configure the loan's terms and repayment schedule.
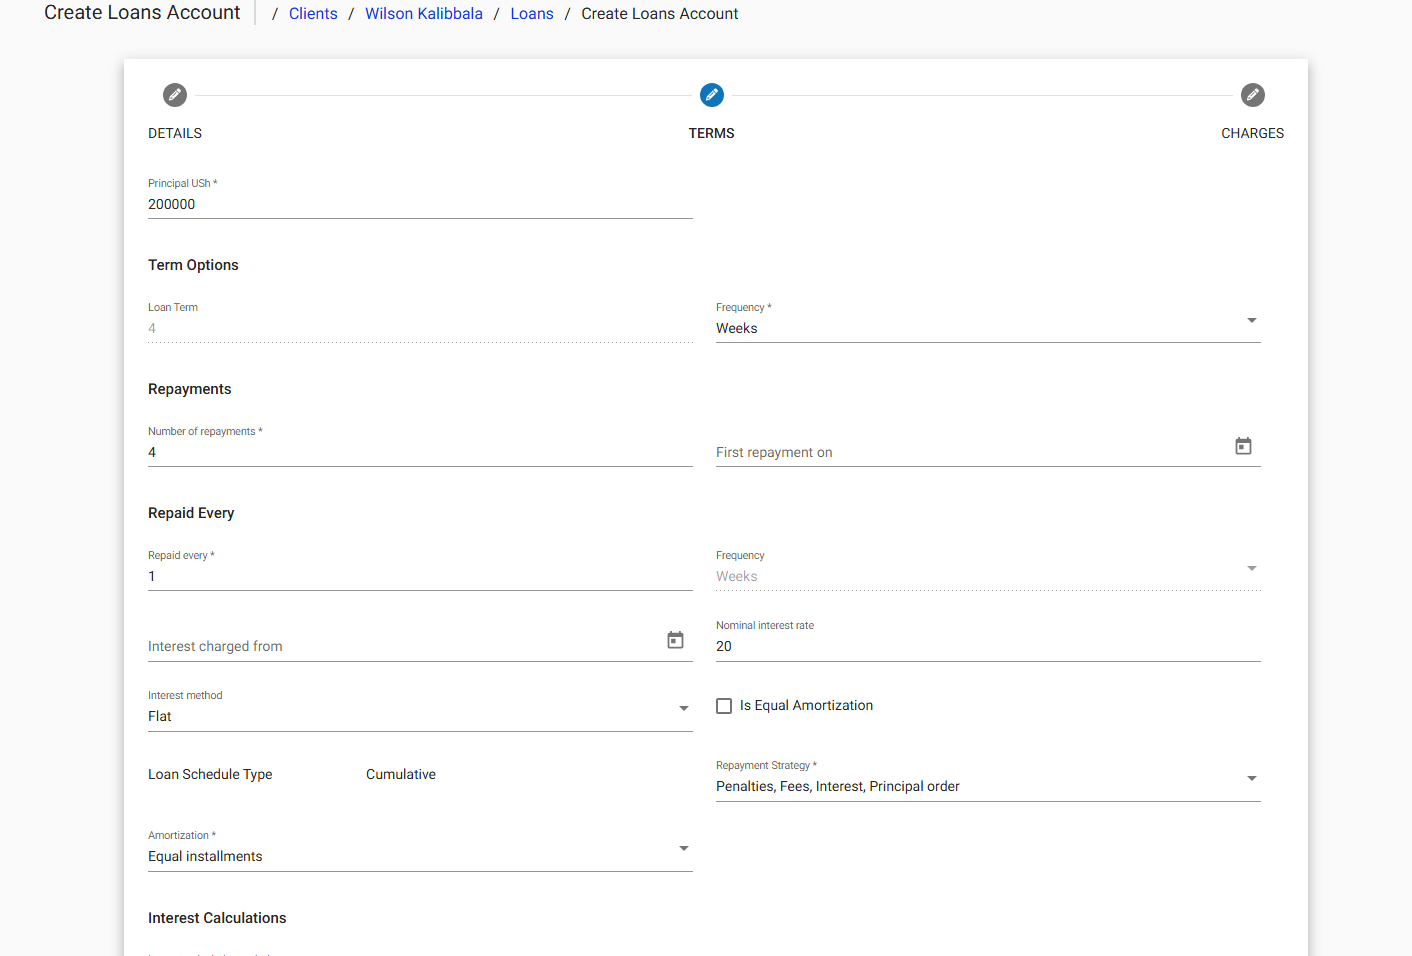
Principal: Enter the principal loan amount (e.g., 20000).
Loan Term: Set the loan term and frequency (e.g., 4 Weeks).
Number of repayments: Define the number of repayments.
First repayment on: Set the date for the first repayment.
Repaid Every: Set the number of weeks or days between repayments
Nominal interest rate: Enter the interest rate for the loan
Review all other options and set appropriately.
Click Next to move to the "Charges" tab.
1.6 Add Charges (Optional):
On the "Charges" tab, you can add any applicable charges to the loan. Select a charge from the dropdown and click Add.
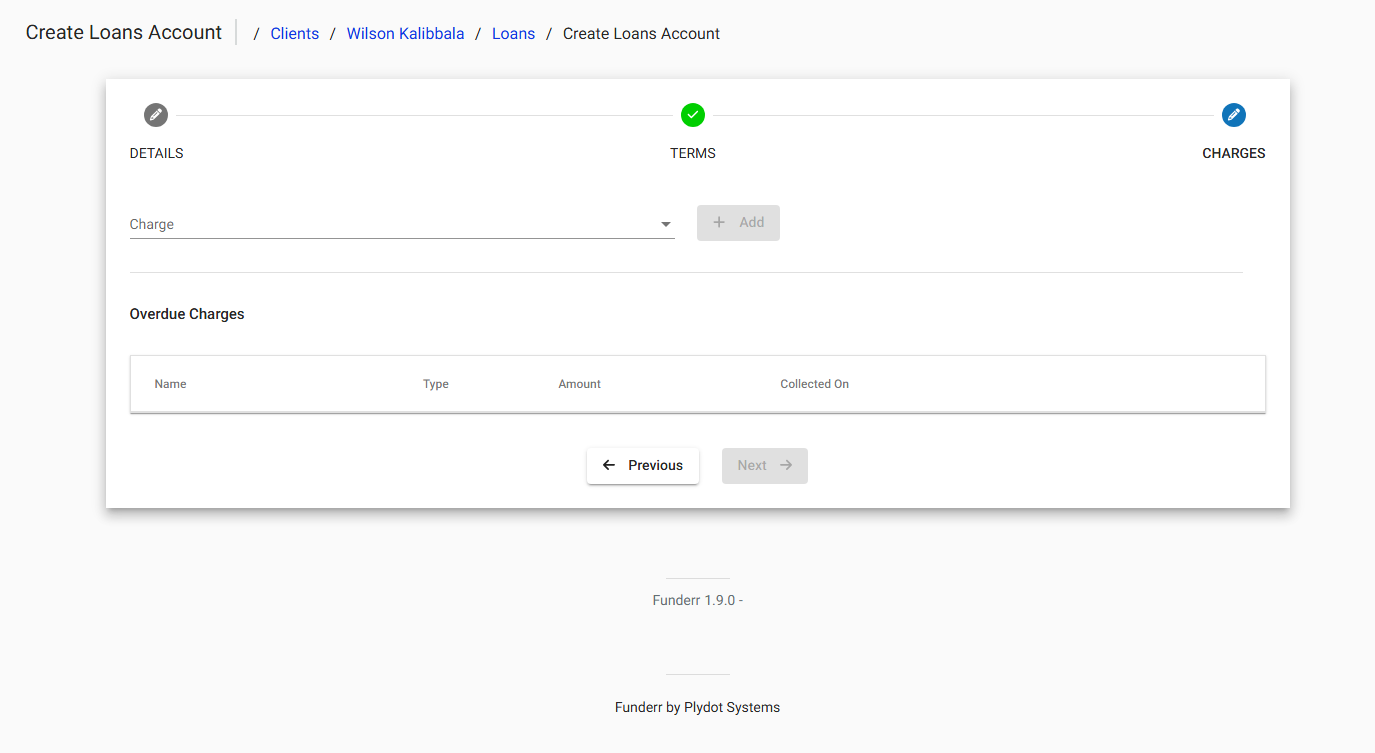
Click Next to review the loan details.
1.7 Add Collateral (Optional):
Click Add to include collateral securing the loan.
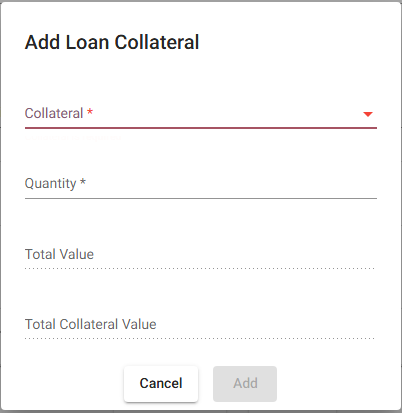
Collateral: Select collateral from the dropdown
Quantity: Add quantity of the collateral
Total Value: Enter total value of the collateral
1.8 Save the Loan:
Review all the loan details and save the loan. The system will then calculate the repayment schedule based on the entered information.
2. Managing Existing Loan Accounts
This section covers how to manage and monitor existing loan accounts.
2.1 Viewing Loan Details:
From the client's "General" tab, locate the "Loan Accounts" section. Click on the account number of the loan you want to view.
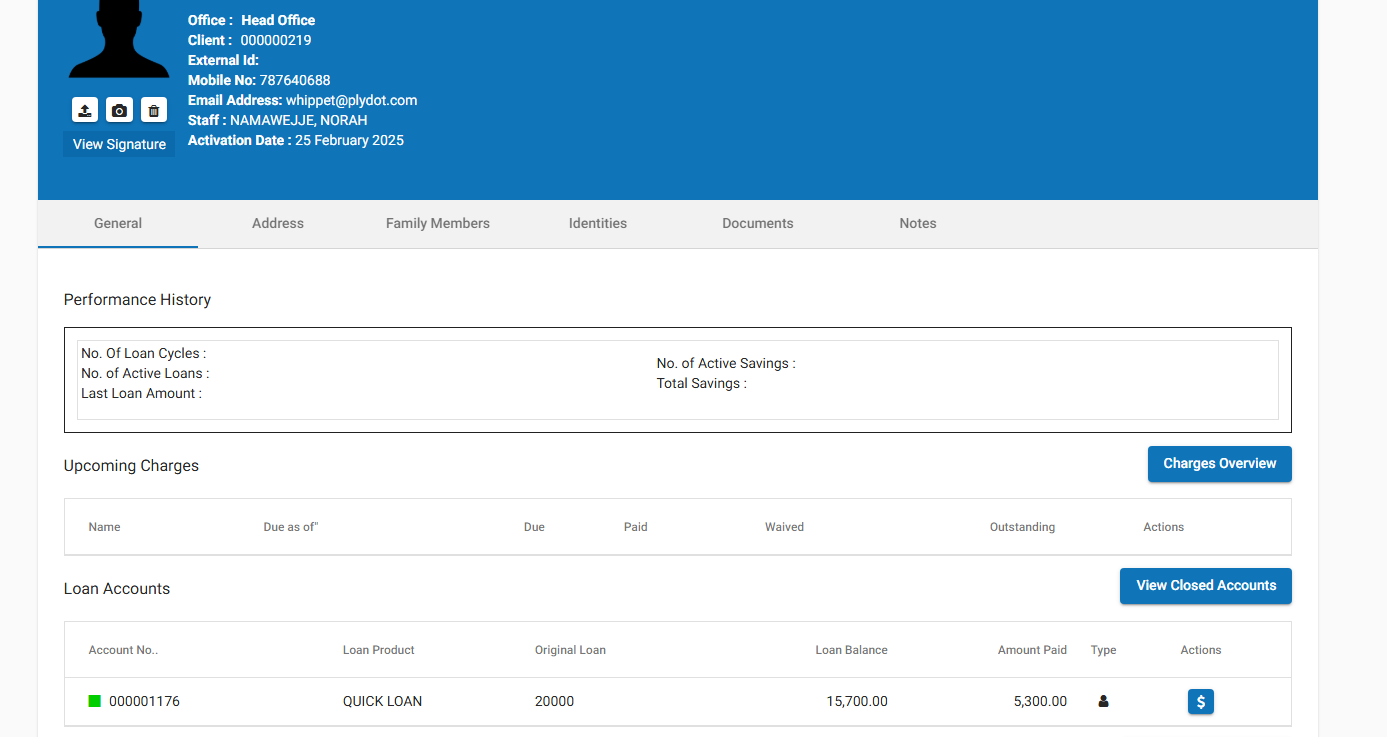
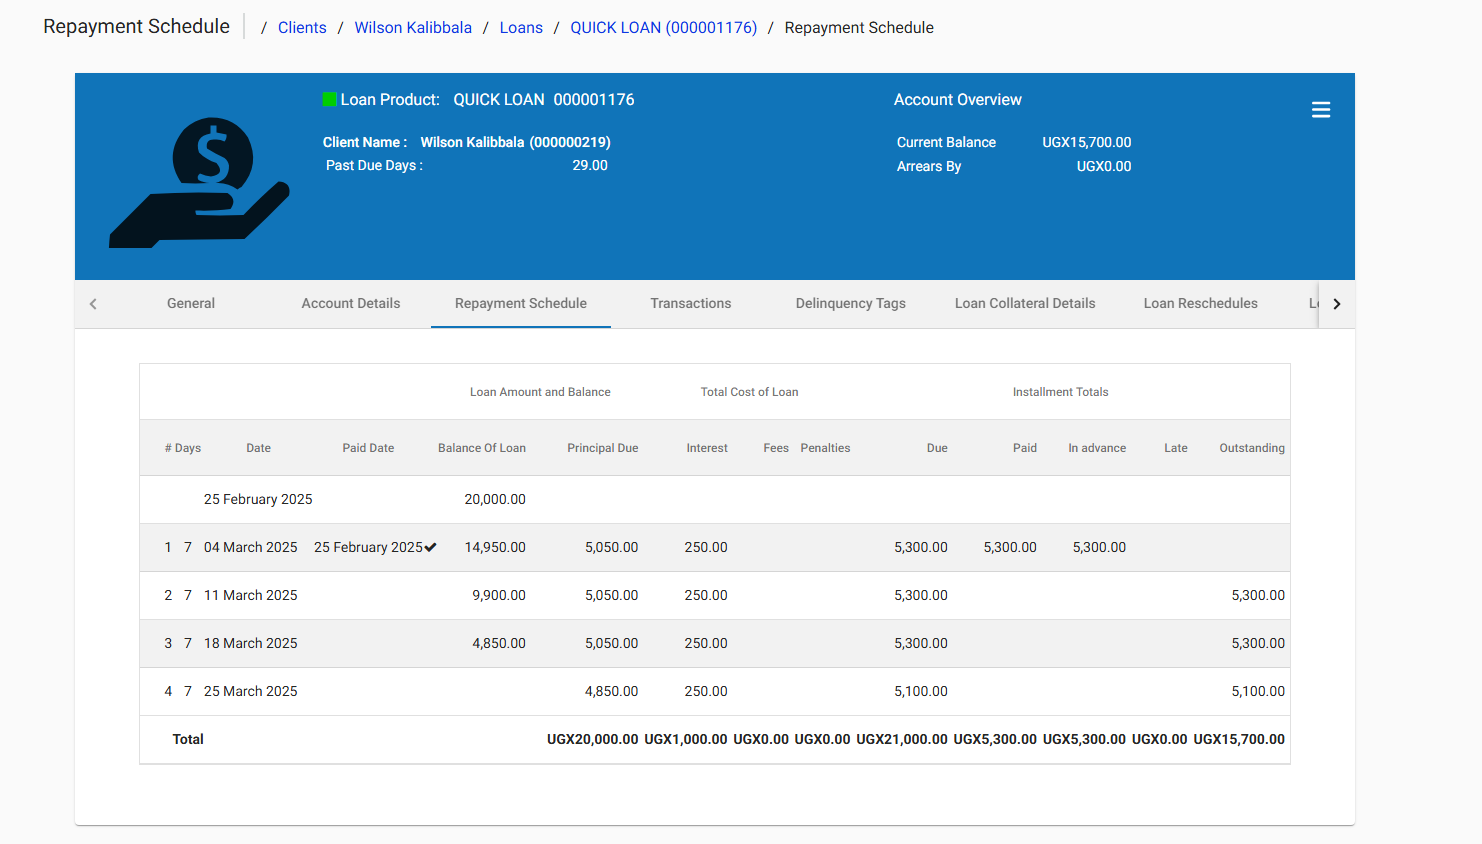
This will display the loan details, including the loan amount, interest rate, repayment schedule, and transaction history.
2.2 Recording Repayments: (This will need a screenshot of the repayment screen once you've navigated to a specific loan.)
Navigate to the specific Loan Account as mentioned in step 2.1
The details page will allow you to register incoming payment.
