Managing Clients in Funderr
This guide explains how to manage clients effectively within Funderr.
1. Accessing the Clients List
Learn how to access a list of all clients:
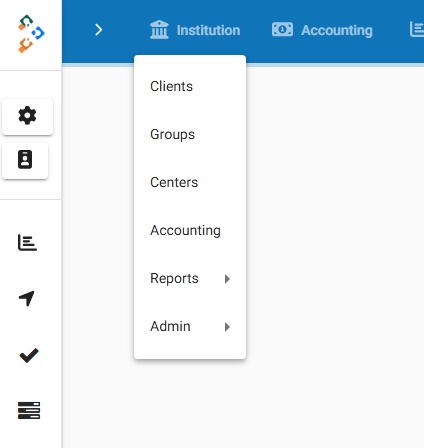
1.1 Open the Menu by selecting "Institution" from the main navigation.

1.2 On the dropdown list, select "Clients".
1.3 The list of Clients associated with your organization will be displayed.

2. Viewing Client Details
Clicking on a client's name in the list will bring you to their details page.
From here, you can see detailed information about the client including contact information, loan history, and savings accounts.
3. Creating New Clients
Learn how to add new clients. Before moving forward, be sure that the correct office is active to assign the client to:
3.1 Verify the "Office" matches your current office.
3.2 Click the "+ Create Client" button.

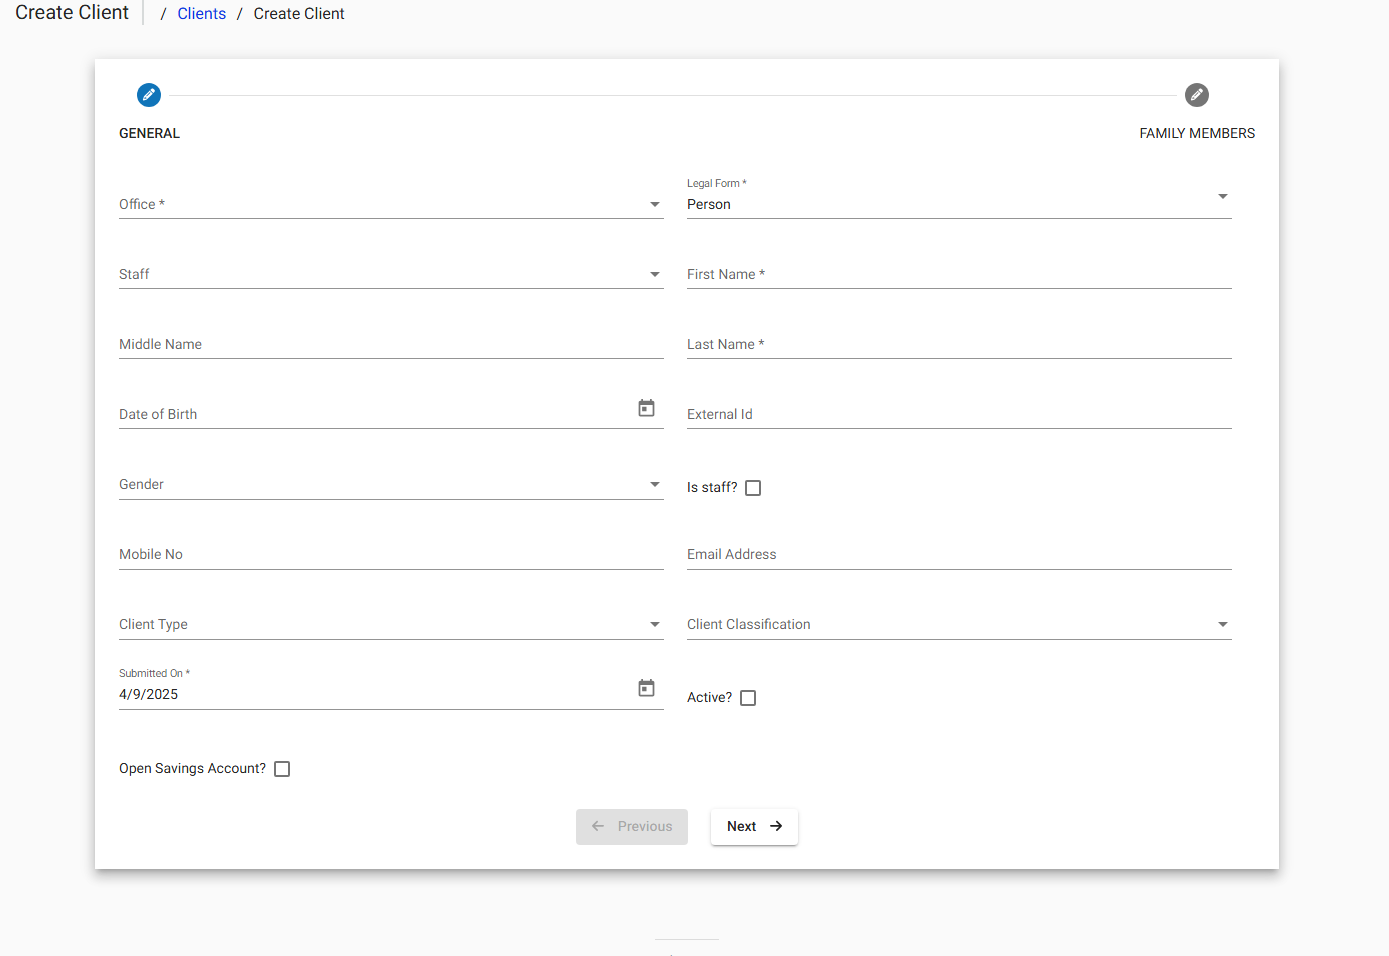
3.3 The "Create Client" form will be displayed.

3.4 Fill in the required information on the "General" tab:
Office: Select the client's office.
Legal Form: Select the legal form of the client (e.g., Person, Company).
Staff: Select the staff member responsible for the client.
First Name: Enter the client's first name.
Middle Name: Enter the client's middle name (optional).
Last Name: Enter the client's last name.
Date of Birth: Enter the client's date of birth.
External ID: Enter an external identifier for the client (optional).
Gender: Select the client's gender.
Is Staff?: Indicate if the client is also a staff member.
Mobile No: Enter the client's mobile number.
Email Address: Enter the client's email address.
Client Type: Select the type of client.
Client Classification: Select the classification of the client.
Submitted On: Enter the date the client information was submitted.
Active?: Indicate if the client is active.
Open Savings Account?: Select this option to open a savings account for the client upon creation.
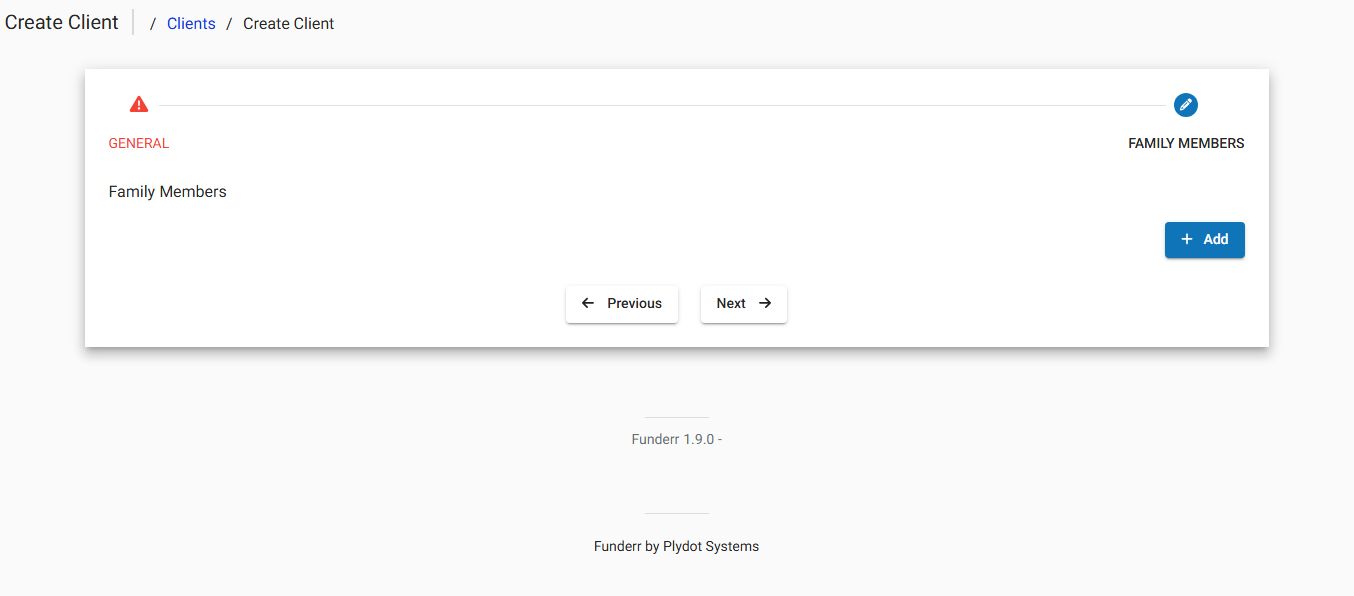
3.5 Click the "Next" button to proceed to the "Family Members" tab.

3.6 Add Family Members (Optional):
Click the "+ Add" button to add a family member.
Enter the family member's information.
3.7 Click the "Next" button again if needed to add more details. Then, submit to complete the form
4. Importing Clients
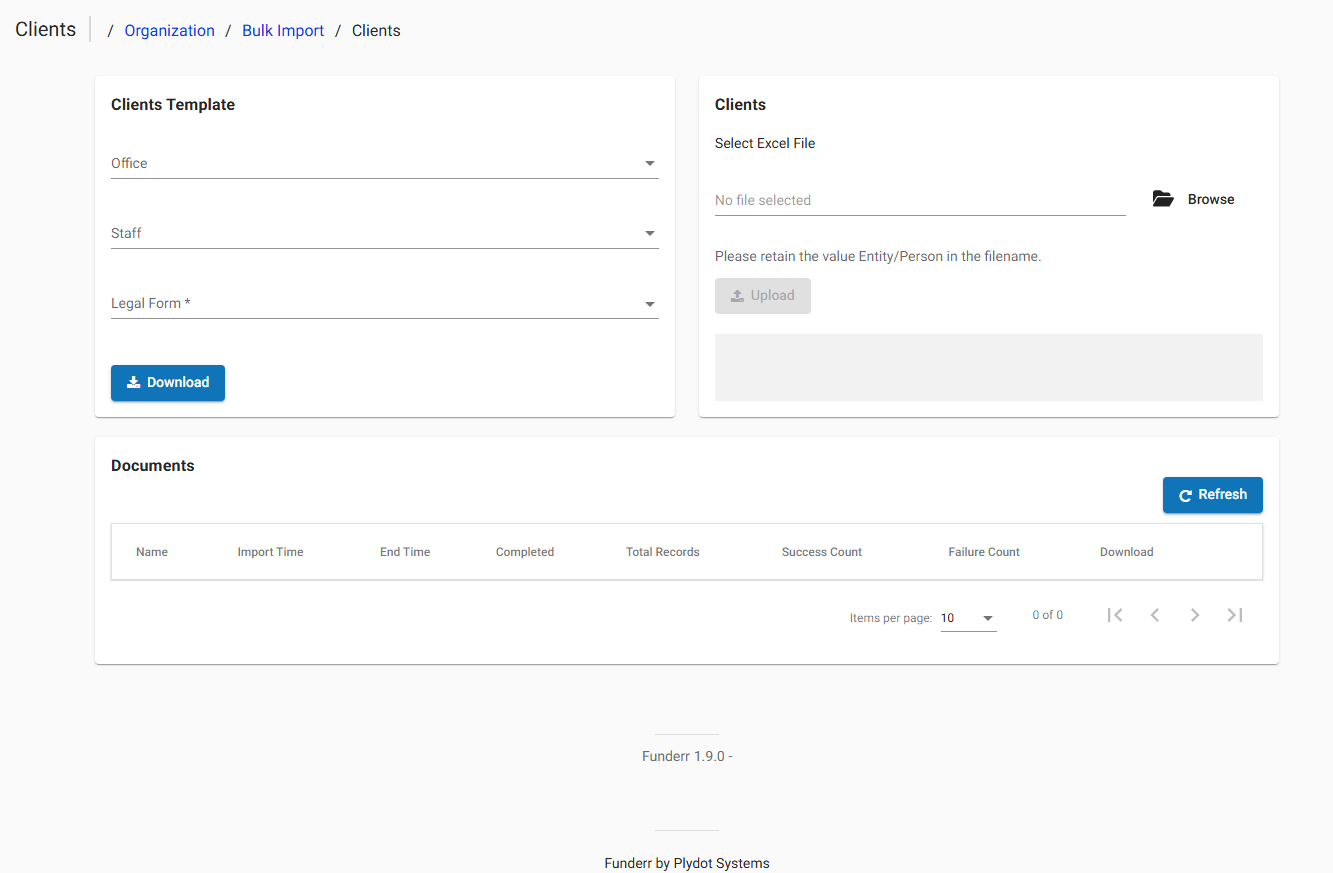
You can import clients in bulk using a CSV file.
4.1 From the client listing screen, select the "Import Client" button

4.2 On the Bulk Import Screen select the details of your Client Template.

4.3 To get the template, download the template with the associated fields.
4.4 Select the Excel file, and then you can upload your saved data.