Managing Centers in Funderr
This guide explains how to manage Centers effectively within Funderr. Centers are essential for organizing your clients, tracking performance, and managing your operations, particularly for MFIs that operate with the Group Lending Model or through branches.
1. Understanding Centers
Centers are typically used to represent physical locations, branches, or operational units where your organization operates. They can also be used to group clients for reporting and management purposes. In Funderr, Centers serve as a focal point for client management, loan tracking, and reporting.
2. Accessing the Centers List
Learn how to access the list of Centers to manage your existing centers or create new ones:
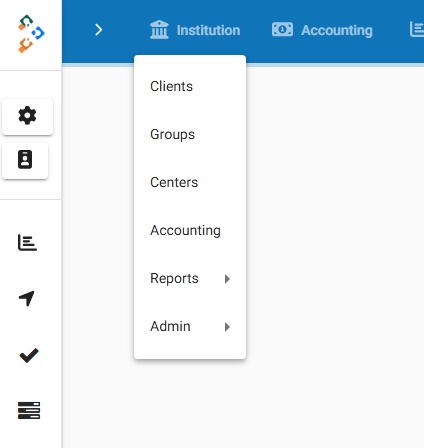
2.1 Navigate to Institution: Open the Menu by selecting "Institution" from the main navigation.
2.2 Select Centers: On the dropdown list, select "Centers".
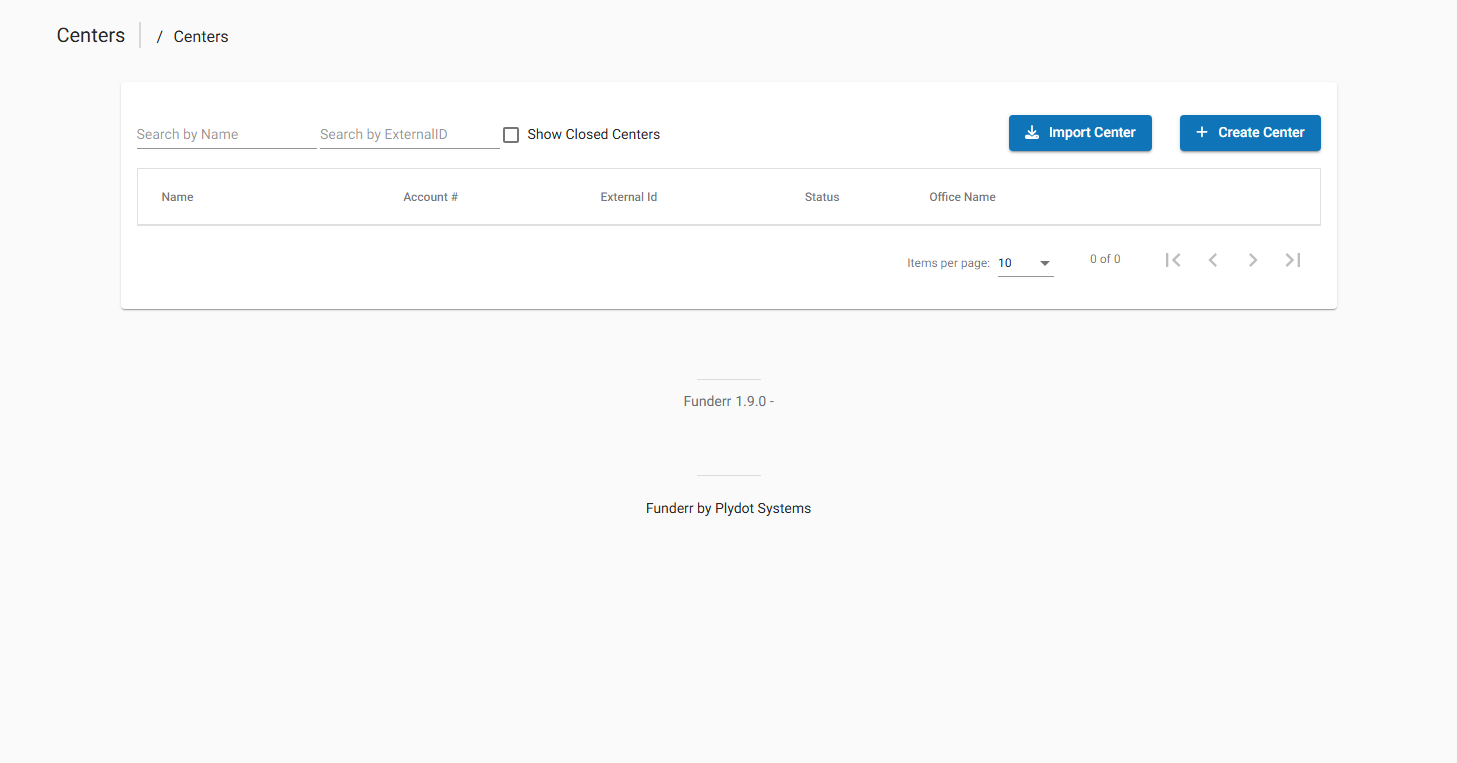
2.3 View the Centers List: The list of Centers associated with your organization will be displayed.
3. Creating New Centers
Learn how to create a new Center to expand your operations or organize your clients more effectively:
3.1 Access the Create Center Form: From the Centers List screen, click the "+ Create Center" button.
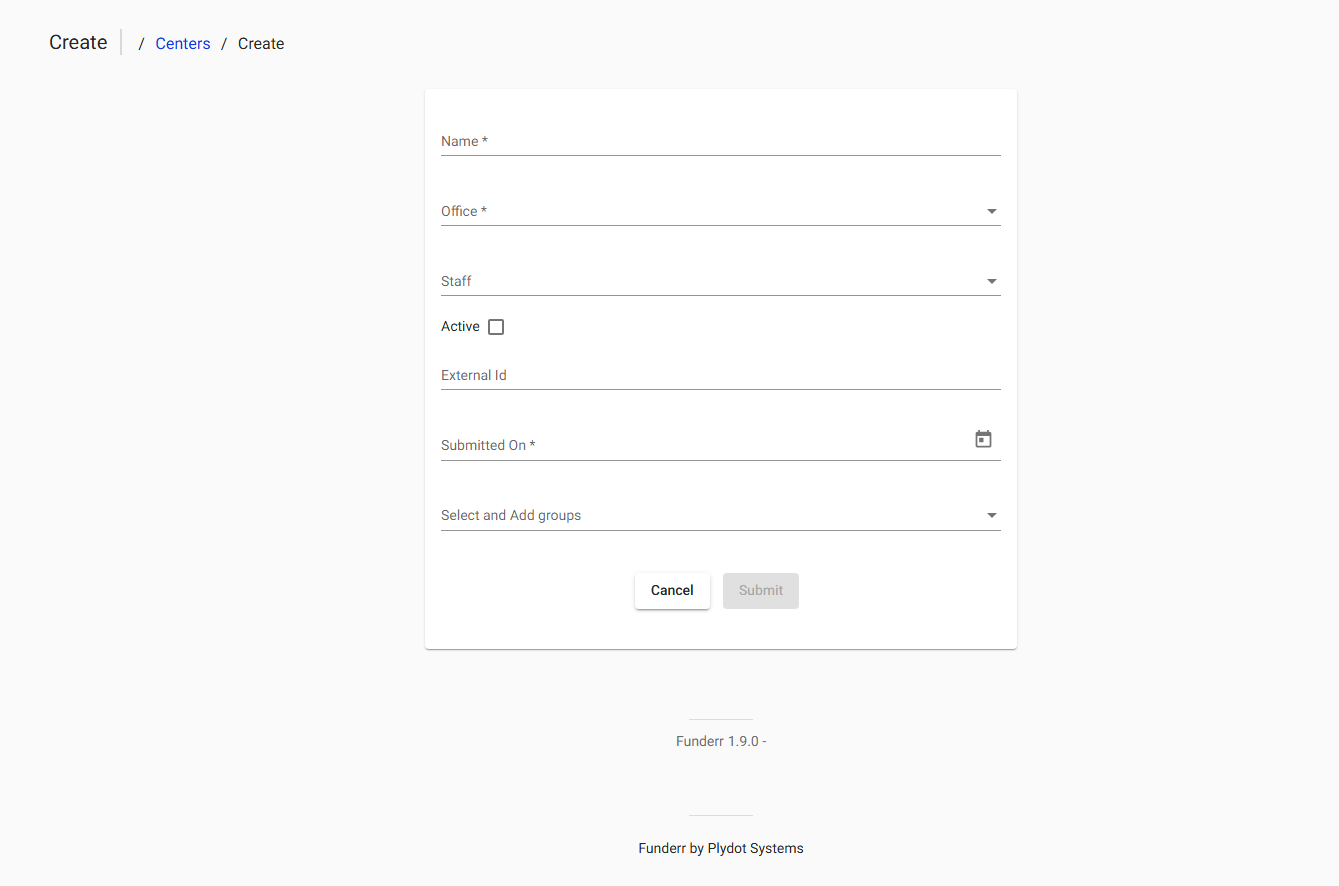
3.2 View the Create Center Form: The "Create Center" form will be displayed, where you enter the details for the new center.
3.3 Fill in the Required Information: Complete the form with the necessary details.
Name: Enter the name of the center (required).
Office: Select the office to which the center belongs (required). This establishes the organizational hierarchy.
Staff: Select the staff member responsible for the center (required). This assigns a staff member to the center.
Active: Indicate if the center is currently active (checkbox). Setting to active sets the center to active.
External ID: Enter the External ID (optional).
Submitted On: Select the date the Center was submitted.
Select and Add groups: Add the existing group to be used (optional). Assigns to the center.
3.4 Save the Center: Click the "Submit" button to save the center and add it to your organization.
4. Importing Centers in Bulk
You can import centers in bulk using a CSV file, allowing you to quickly add multiple centers to your organization.
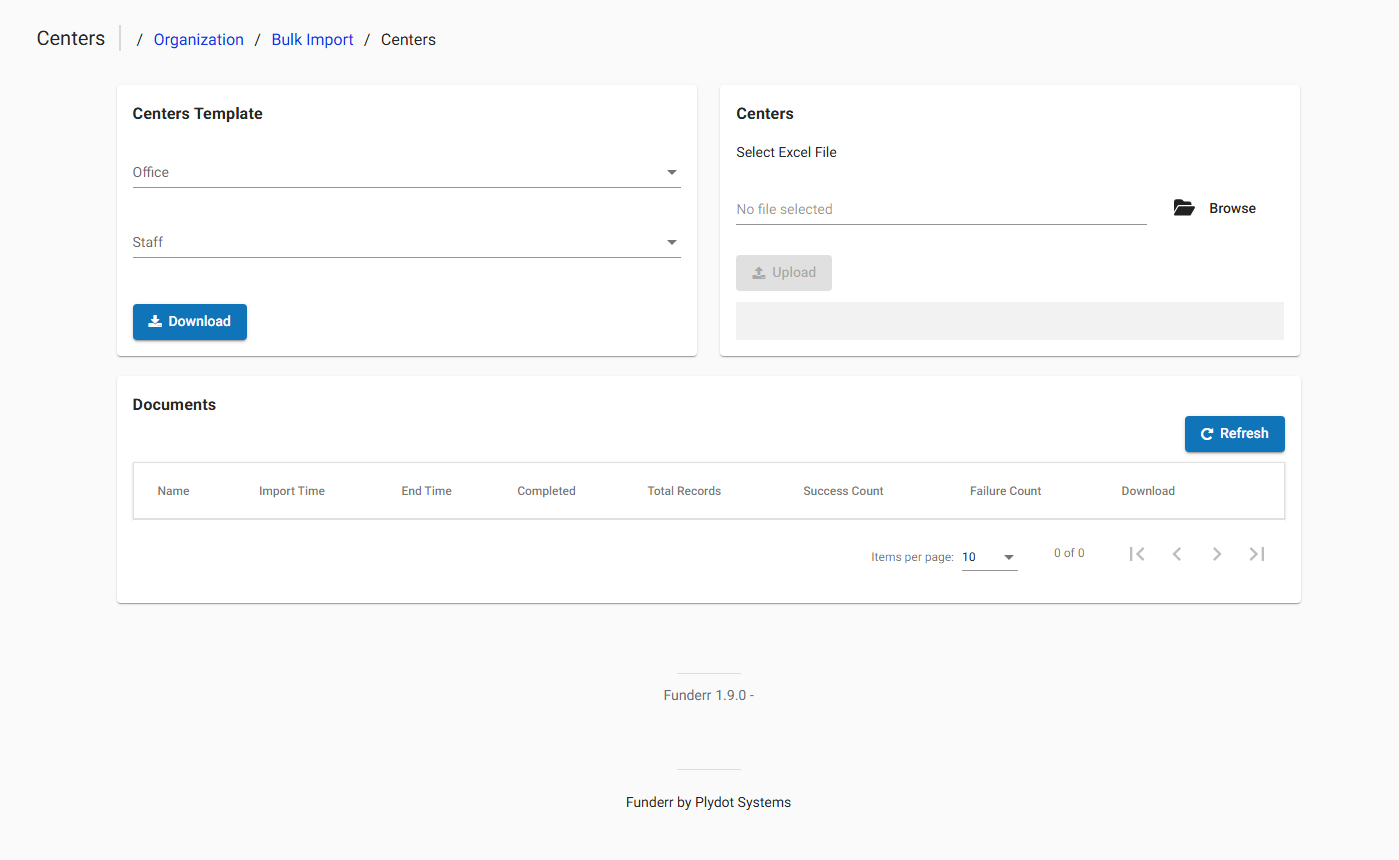
5.1 Navigate to the Bulk Import Screen: From the Centers Listing Screen, select the "Import Center" button.
5.2 Configure the Import Settings: On the Bulk Import Screen, select the details of your Center Template.
5.3 Download the Template: To ensure your CSV file is correctly formatted, download the template CSV file, enter the relevant information and save.
5.4 Upload the Data: Select the Excel file, and then you can upload your saved data.
5. Managing Existing Centers
Steps to managing existing centers:
5.1 Adding Group: Add existing groups to the center.
5.2 Editing the center: Edit the Center Details.
5.3 Deactivating center: Deactivate center for the current time.


