Managing Groups in Funderr
This guide explains how to manage groups effectively within Funderr.
1. Understanding Groups
Groups are collections of clients who are managed together. This is often used in microfinance for group lending or savings programs.
Managing clients in groups can simplify administration and improve loan repayment rates.
2. Accessing the Groups List
Learn how to access the list of groups:
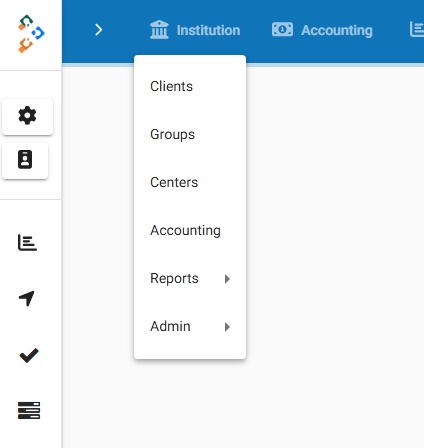
2.1 Open the Menu by selecting "Institution" from the main navigation.

2.2 On the dropdown list, select "Groups".
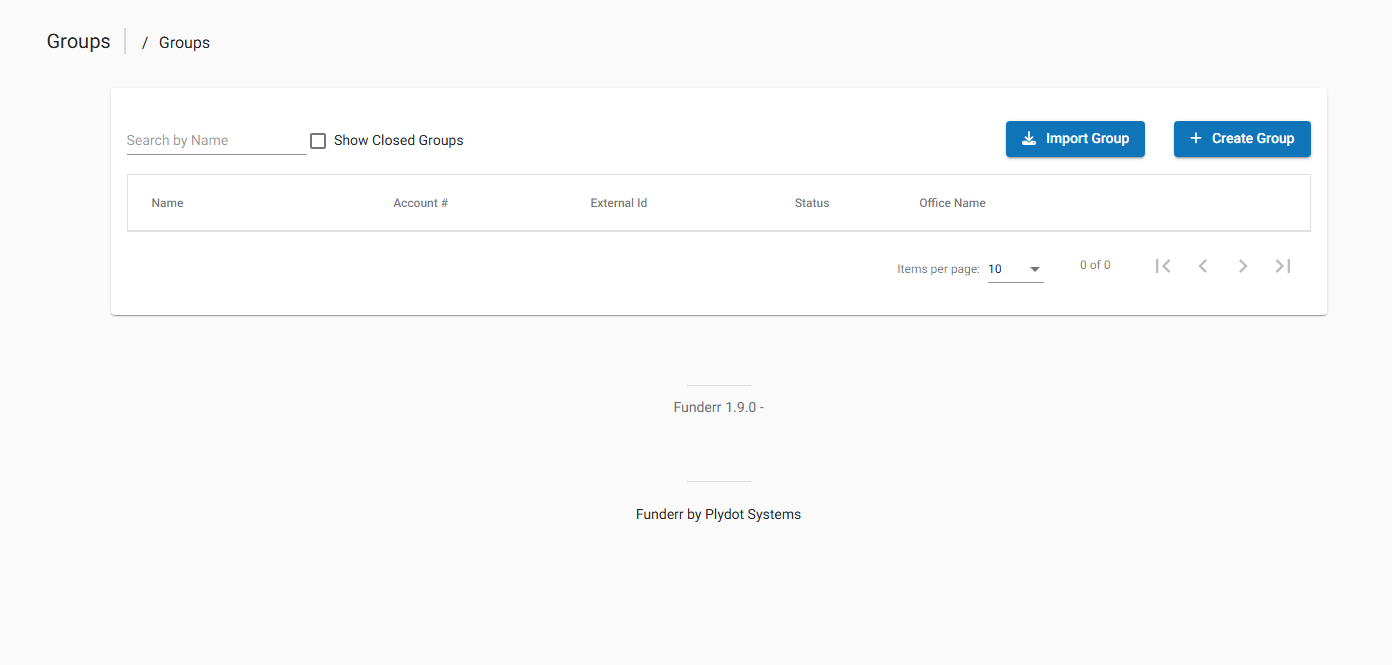
2.3 The list of Groups associated with your organization will be displayed.

3. Creating New Groups
Learn how to create a new group:
3.1 From the Groups List screen, click the "+ Create Group" button.

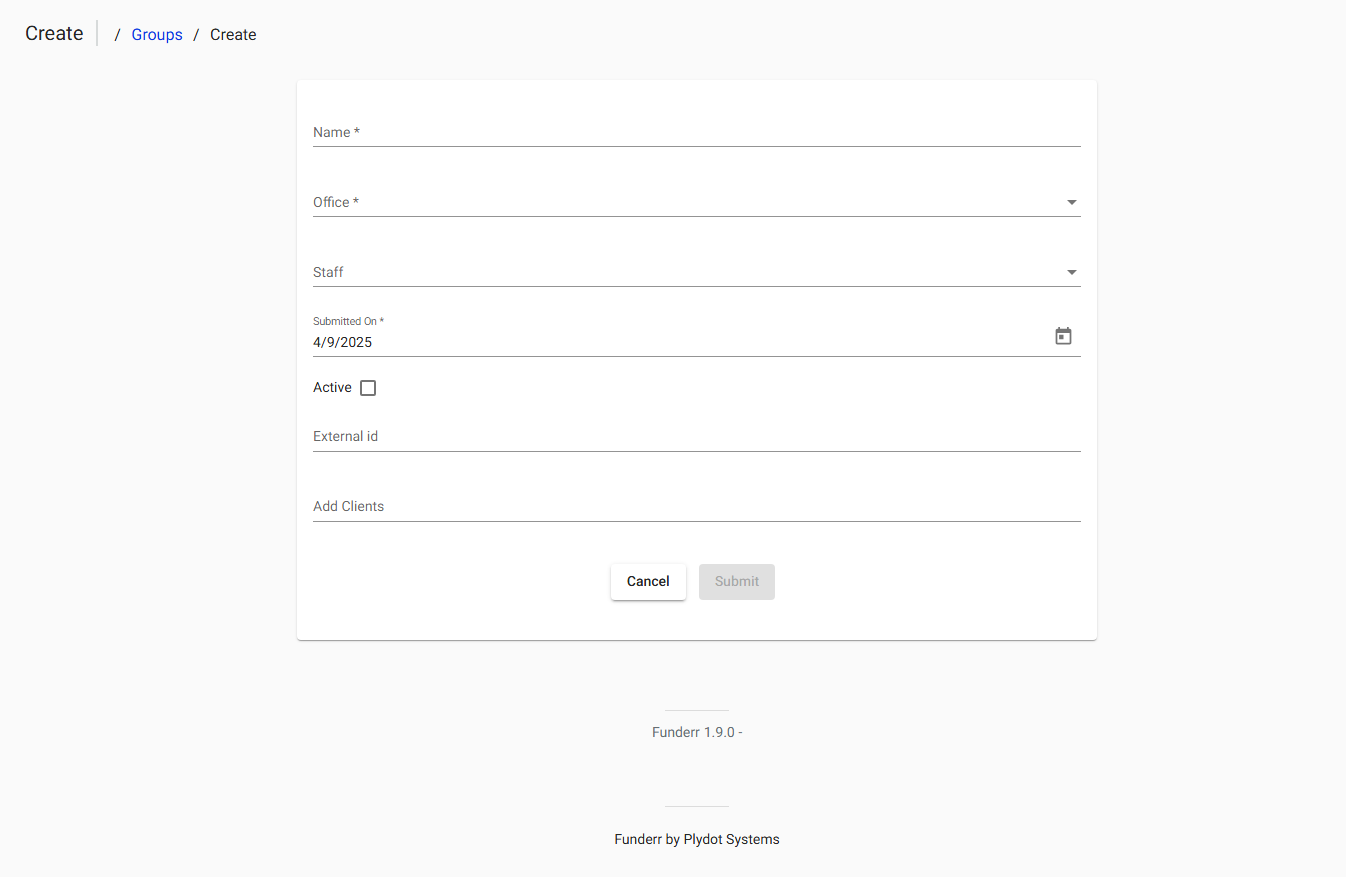
3.2 The "Create Group" form will be displayed.

3.3 Fill in the required information:
Name: Enter the name of the group.
Office: Select the office to which the group belongs.
Staff: Select the staff member responsible for the group.
Submitted On: Enter the date the group information was submitted.
Active: Indicate if the group is active.
External ID: Enter an external identifier for the group (optional).
3.4 Click the "Submit" button to save the group.
4. Adding Clients to a Group
After creating a group, you need to add clients to it.
4.1 Open the Group Details page.
4.2 Click the "Add Clients" button (or similar).
4.3 Select the clients to add to the group.
4.4 Save the changes.
5. Importing Groups
You can import groups in bulk using a CSV file.
5.1 From the Group Listing Screen select the "Import Group" button

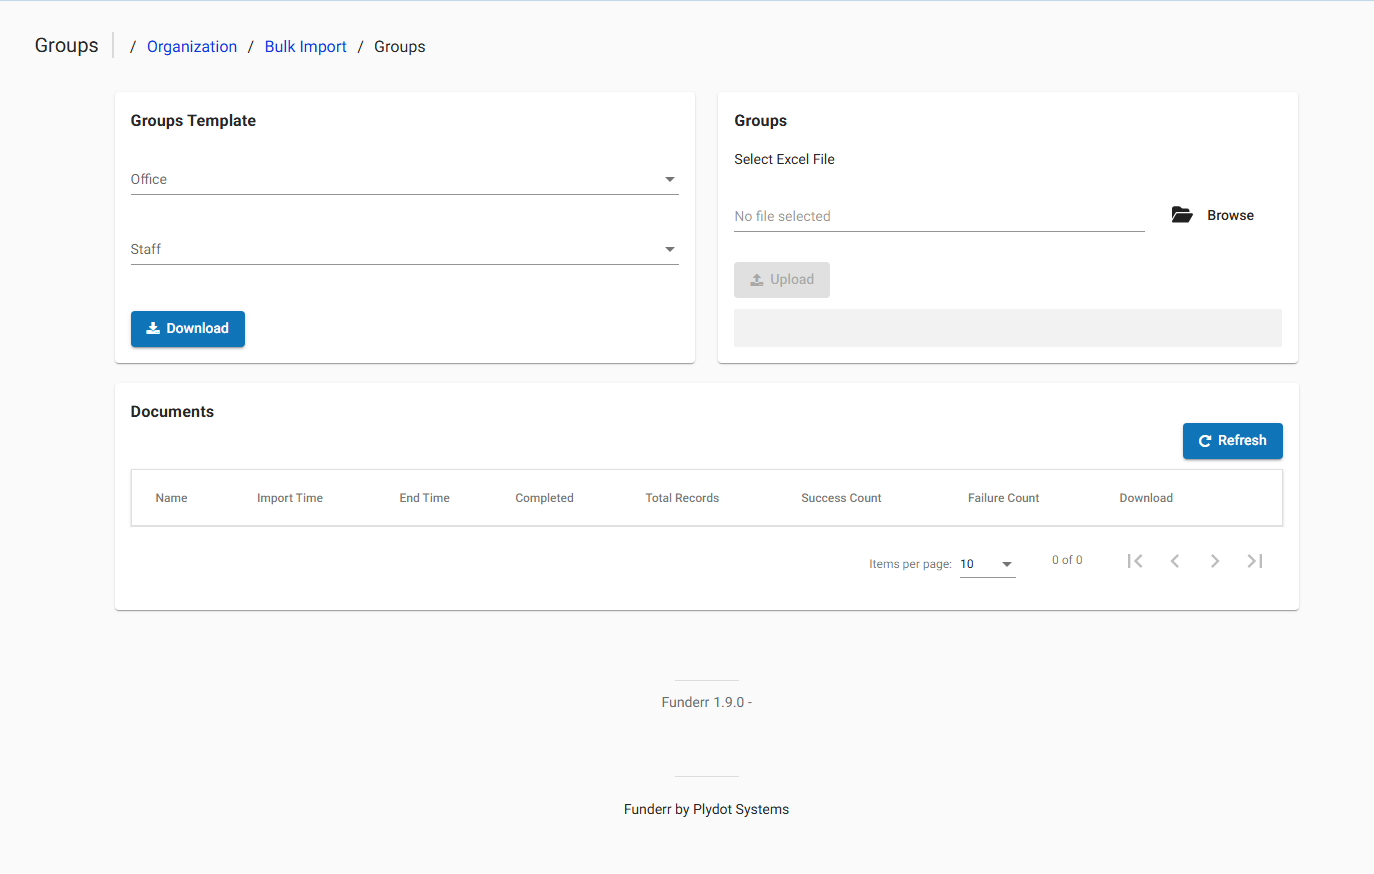
5.2 On the Bulk Import Screen select the details of your Group Template.

5.3 To get the template, download the template with the associated fields.
5.4 Select the Excel file, and then you can upload your saved data.