Managing Offices
This guide explains how to add, modify, and deactivate offices within Funderr.
1. Accessing the Manage Offices Screen
To access the Manage Offices screen:
1.1 Select "Admin" from the main menu.
1.2 Click on "Organization."
1.3 Click on "Manage Offices."
2. Viewing the List of Offices
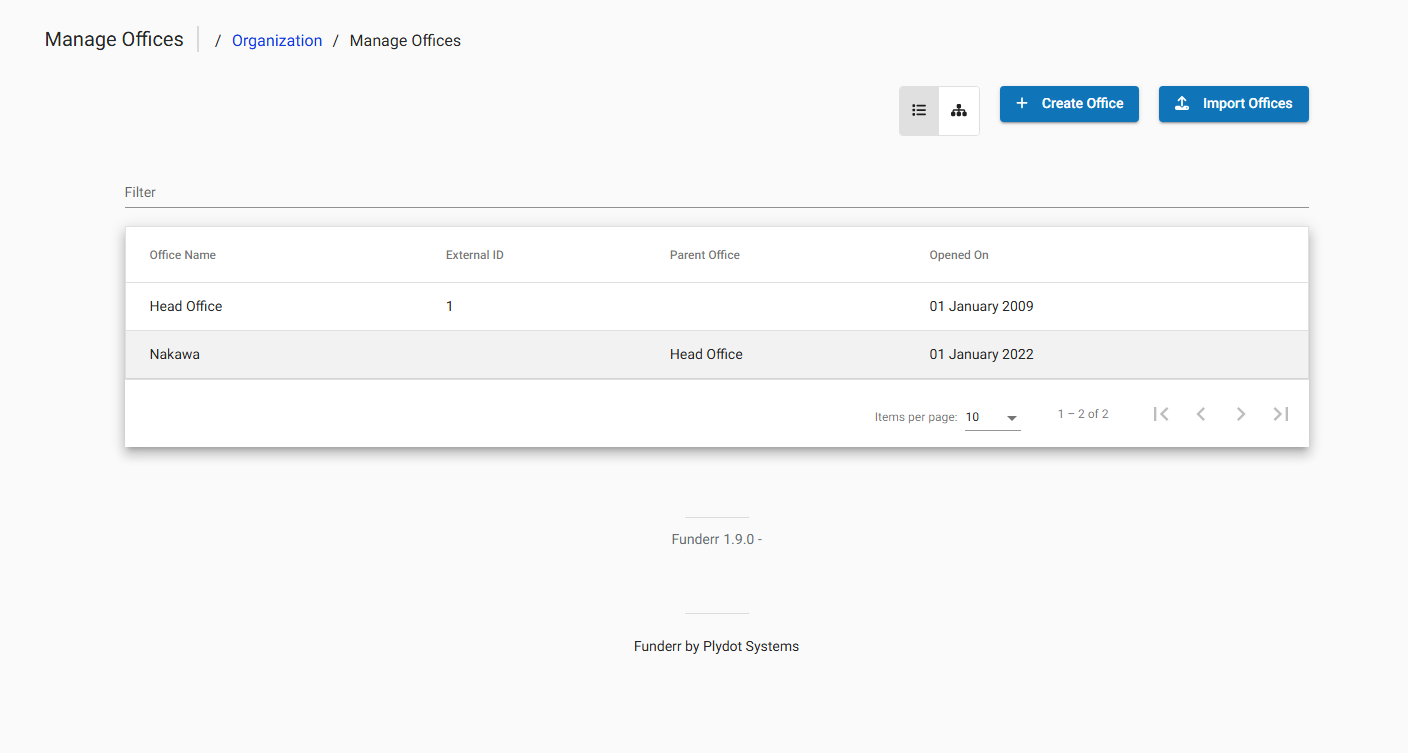
The Manage Offices screen displays a list of all offices in Funderr.

Office Name: The name of the office.
External ID: An external identifier for the office (optional).
Parent Office: The parent office in the hierarchy.
Opened On: The date the office was opened.
3. Creating a New Office
To create a new office:
3.1 Click the "+ Create Office" button.

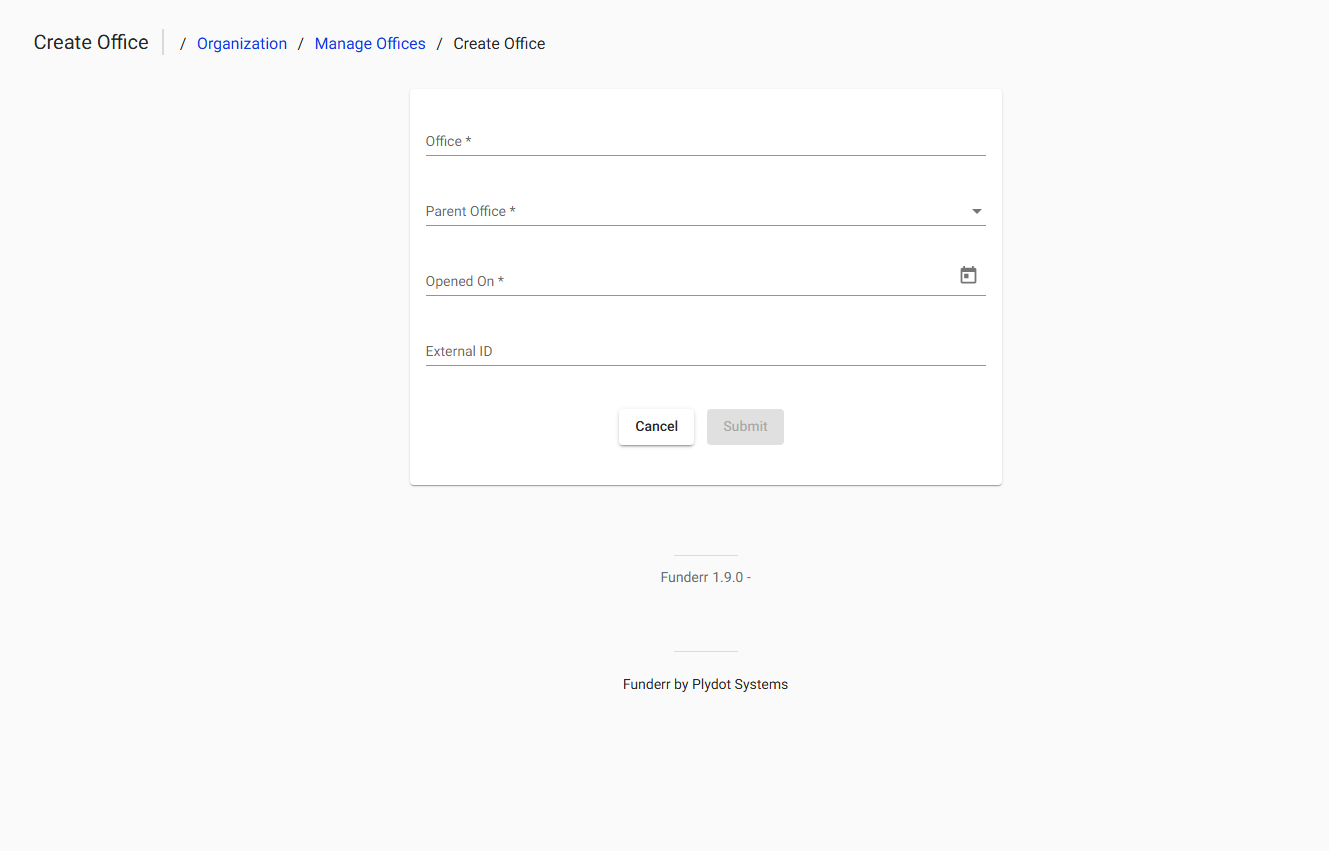
3.2 Fill in the "Create Office" form.

3.3 The fields on the form are:
Office: The name of the new office.
Parent Office: The parent office in the hierarchy (select from dropdown).
Opened On: The date the office was opened.
External ID: An external identifier for the office (optional).
3.4 Click the "Submit" button to save the new office.
4. Importing Offices
You can import offices in bulk using a CSV file.
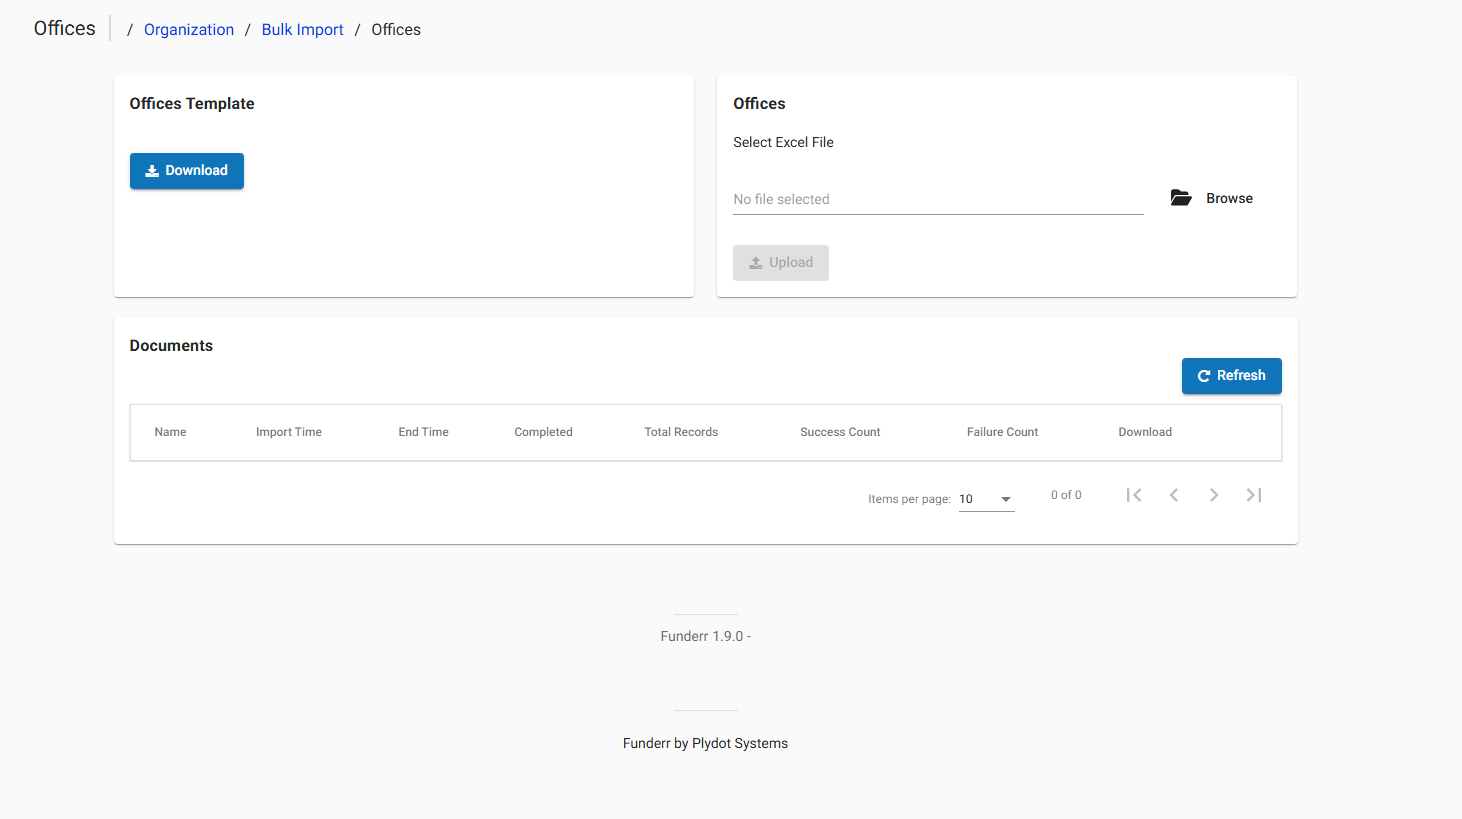
4.1 From the manage office screen select the "Import Office" button

4.2 On the Bulk Import Screen select the details of your Office Template.

4.3 To get the template, download the template with the associated fields.
4.4 Select the Excel file, and then you can upload your saved data.